Want to try Linux OS/distro while keeping our Windows intact? We can, by dual booting it. And Kubuntu is one of good start for people coming from most used OS like Windows.
Kitutech — Kubuntu is one of official Ubuntu flavours, featuring the many said user friendly interface, KDE Plasma desktop.

Though for me personally, Linux Mint's Cinnamon desktop is still more user friendly than KDE Plasma.
However, if we coming as a long time Windows user, on a glance, Kubuntu with its KDE Plasma may will make use slightly, I said slightly at home. 🙂
How to dual boot Kubuntu and Windows on our PC


Requirements:
- PC with 64-bit processor
- Bootable media creation tool, such as Ventoy or Rufus.
- Backups!
My environment:
- Kubuntu version: 22.04.1
- Installed OS: Windows 11
- Device: Toshiba Dynabook R734/K
- Processor: Inter i3-4000M
- RAM: 8 GB
- Storage: 40 GB SSD partition
Steps:
- Prepare two new empty partitions on our PC's disk, for example we can use the Windows' Disk Management (Shrink volume):
a.) A ≥ 32 GB partition, to host the Kubuntu OS files.
b.) (Optional) A partition with same or double our RAM size for a swap partition. This is recommended if our PC have small RAM. - Download the Kubuntu iso at the official website: kubuntu.org/getkubuntu/. Then make a bootable media of it, here I am using Ventoy.
- Disconnect any external storage drives. This is to prevent formatting/erasing wrong storage or partition when installing the Kubuntu OS files later.
- Boot our PC into the created Kubuntu bootable media. In short, boot our PC to the BIOS menu, then choose to boot from the bootable media there. For Dynabook R734/K, we can view the example below (Click to expand).
Booting to a bootable media on Toshiba Dynabook R734/K laptop (example booting into Ventoy media)
- Access the
Boot Menu(BIOS menu) on Dynabook R734/K by restarting the laptop and repeatedly pressing F12 until the boot menu/BIOS menu appears. - If the Kubuntu installation/bootable media (e.g., USB storage stick) is not plugged in, do so now to make it appears in the BIOS boot Menu.
- In the Boot Menu, select the installation/bootable media (e.g. USB drive) to boot into it directly. Alternatively, adjust the boot order to prioritize the installation/bootable media for automatic booting. Follow these steps:
- Choose
Enter Setupfrom the Boot Menu main menu.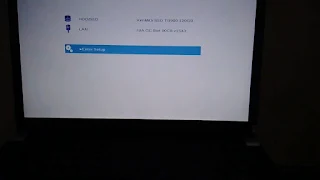
- In the side menu, select
Advanced, scroll down, and chooseChange Boot Order.
- Set the USB drive (or your relevant storage) where the Kubuntu bootable media is located to the top of the Boot Priority Options and click
OK.
- Select
Exit→Exit Saving Changesfrom the side menu.
- Choose
- In the Ventoy boot main menu, consider switching to GRUB2 Mode for increased compatibility in booting Linux images by pressing Ctrl+R. Then, browse and select the Kubuntu iso and press Enter to initiate the Kubuntu OS live media boot process.


- After booting to the Kubuntu black GRUB booting menu, choose "Try or Install Kubuntu" to boot to the Kubuntu live CD desktop.
- A welcome window will be showed, we can choose "Install Kubuntu" to start the installation procedure right away, or "Try Kubuntu" to use (test) it without making any changes, which we can launch the "Install Kubuntu…" shortcut on the desktop later to install it.
- Now we moved to the installation window, first choose language and keyboard layout. Click "Continue" on the bottom right to proceed.

- Wireless window. We can connect to a network so Kubuntu will update simultaneously when installing it later. Here, I am choose "I don't want to connect…" → "Continue".

- Updates and other software window. Here we can choose between "Normal installation" with complete set of common used softwares, or "Minimal installation". Below it, it's recommended to tick the "Install third-party software for graphics…", unless you're a casual Linux user already → "Continue".

- Installation type window. It's where we configure the disk and partition where Kubuntu OS files will be installed. Since we already prepared our partition beforehand, here we choose "Manual" → "Continue".

- Now the window will switch to Prepare partitions window. Click the partition where Kubuntu OS files will be installed to, click "Change" on the bottom. First, on the "Use as" selection, choose "Ext4 journaling filesystem", tick the "Format the partition", then on the "Mount point", select to "/" → "OK".


- (Optional) Still on the Prepare partitions window, we will configure the swap partition. Click on the partition we want to use as a swap partition, click "Change" on the bottom. On the "Use as" selection, select "swap area". If the "Format the partition" is not disabled, tick it → "OK".

- Last thing still in the Prepare partitions window, on the bottom, "Boot loader" section, choose the disk where the GRUB bootloader will be installed to. Typically, it's should be our PC's main disk, which is
/dev/sda. After everything is done, click "Install Now" on the bottom to proceed.
- Where are you? window. Configure our timezone, select our "Region", then the "Time Zone", which is our country or capital → "Continue".
- Lastly, the "Who are you" window, fill our user credentials, especially username and password, since it will be used to login to out freshly installed Kubuntu OS → "Continue", and wait until the installation done.
- After the installation done, restart our PC. The next time we boot, the GRUB menu should be showing, allowing us to choose to boot into the Kubuntu or Windows (or any OS installed).


Comments
Post a Comment